Stan's NoTubes Pictorial Tutorial and Review
Stan's NoTubes is one of the few tubeless conversion kits available today to convert regular rims/tires to tubeless. Some others include the Eclipse kit and I think Bontrager has something.
I must say that switching over to Stan's No Tubes has been one of the most significant changes I've ever made to my bike. It has allowed me to cut some serious rotational weight, and allowed me to run tires down to a much lower pressure. This has provided much better traction and handling. The lower tire pressure provides instant suspension, traction for cornering and traction for climbing. The whole debate over rolling resistance from high pressure vs low pressure can go on forever and won't be discussed here too much.
Now that being said, IMHO Stan's is a real pain in the butt to get set up. Once set up it pretty much takes care of itself until you need to add sealant again and need to clean the valve. But if you are the type of person that does not like to tinker, does not like to get frustrated, expects things to work right out of the box, does not want to get messy, does not like to follow directions, does not want to get soapy water everywhere, expects this to work with a few pumps of a floor pump, and expects this to work with every rim/tire combo then :
THIS IS NOT THE PRODUCT FOR YOU. Run away now, and do not use this product and then turn around and Slam it.
Otay. The Stan's kit includes a some strapping tape to tape over the spoke holes, a custom rim strip, and Stan's custom latex sealant. There are several DIY recipes for sealant that you can find online at mtbr.com. I have not messed around with them so far, and don't mind getting his sealant just because I know it works.
Step 0
Go to the No Tubes web page and read all the tutorials and watch all the videos and read all the suggested tire /rim combos listed. I have used Mythos XC, Serac, and a Ritchey tire succesfully with Cane creek velocity rims, and Mavic 517, and an old Sun rim and old Araya rim.
Step 1:
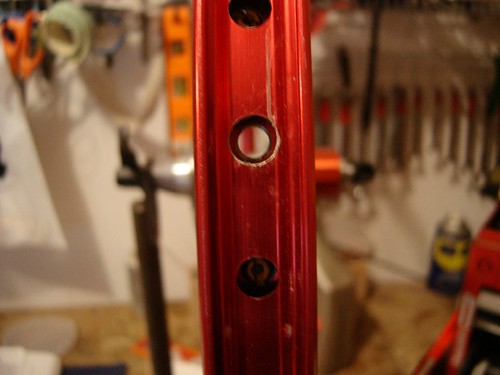
Drill out your valve stem hole to a larger size to accomodate the rim strip. A regular cordless or corded drill works fine. Be careful of the metal chips that are created. It's a good idea to use a magnet to pick them up and keep them out of the rim.
Step 2:
Install the strapping tape. Try to cover all the spoke holes and pull it tight. Pressing down with your finger to smooth it out.
Your valve hole will be covered by the tape and you need to cut it open. Use a knife, scissors whatever
Step 3:
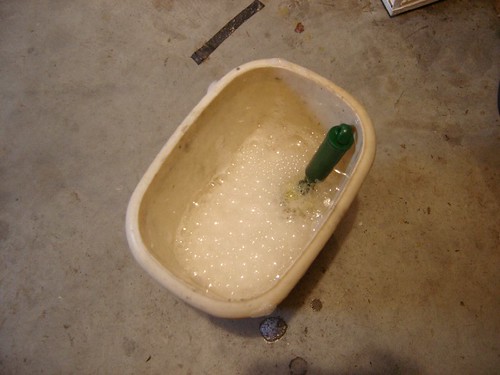
Get your soap solution ready. Don't be stingy with the soap. Others have used Armor all or Tioga Bead wax. I tried armor all and it didn't work too well for me.
Step 4:
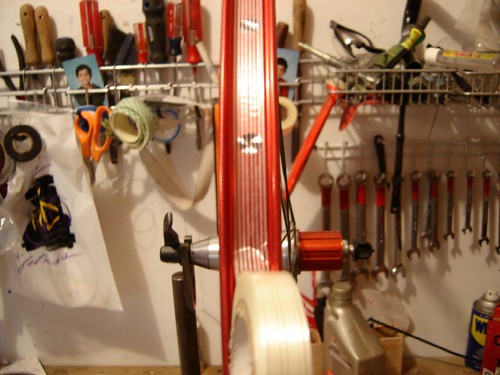
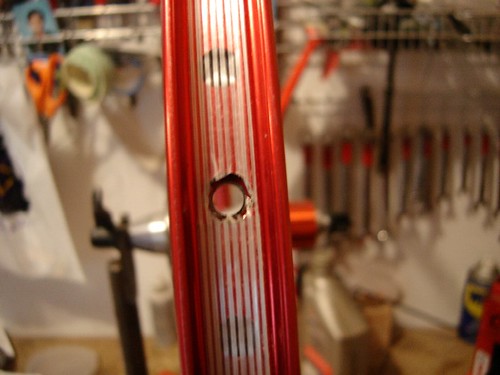
Install the rim strip. I lay down some soap onto the insides of the rim to help get the strip seated.

You want the tension on the strip even all the way around the rim
Use a tire lever or something similar to help push it down under the rim hook
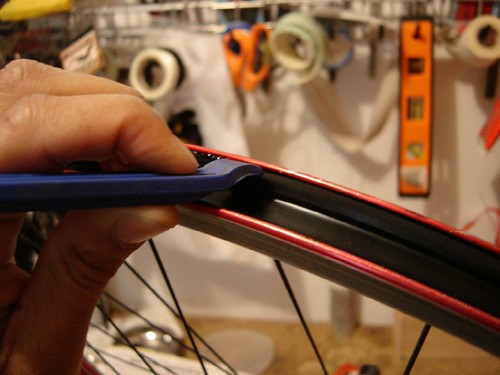
The hardest area is at the valve stem. The bulge of the valve makes it real hard to get the strip seated under the hook here.
Step 5:
Soap it up. Now the fun starts. You soap up the tire bead to help lubricate it so that it can seat under the hook of the rim. Once soaped up you can supposedly air it up. NOT! This is where the frustration lies for me. It takes me many many times of soaping/airing soaping/airing to get a new tire to air up. I use an air compressor. How in the world people can do this with a floor pump is beyond me. Every time I do this on a new tire/rim I get pissed off and want to quit and go back to tubes, but eventually the tire does air up. Use lots of soap to water, and I found that sort of banging the tire on the ground while putting air in helped it seal. Oh and my lower back usually is killing by this time from the constant stooped over soaping/airing position.
If you are like me soapy water will be everywhere, but it will hold air. It is the coolest feeling to finally air this thing up and to see it holding air knowing there is NO tube in there.
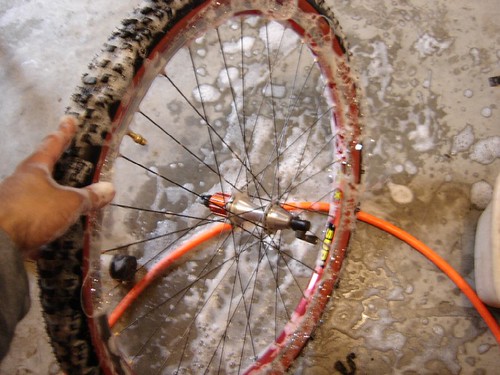
You can see all the bubble where air was leaking out. I usually air it to like 40psi. Don't go too high because you can stretch the kevlar bead.
Step 6:
Adding sealant. Ok ALL that trouble to air it up and now we're going to remove all that air. Huh? Well the good news is that once it has held air it usually airs up easier the next times. Take off one bead and add sealant. Shake up the bottle, and pour the recommended amount in.

Step 7:
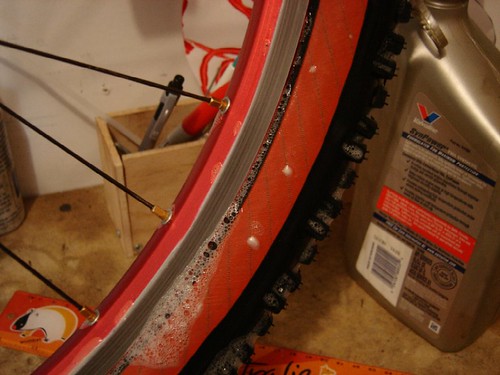
Air it back up. Put the tire back on fully, soap again, and re-air it back to 40psi or so. Then put soap all over the side walls. There will be little micro holes in the sidewalls that need to get sealed up with the latex. Once sealed there should be minimal air loss. If you don't seal them you'll lose air over a couple of days. The soap on the sidewalls helps find those little air holes
Step 8:
Seal any leaks. You need to slosh the sealant up into the sidewalls. Just spinning the tire won't do it. Hold it at the 9 o'clock and 3 o'clock positions with the area you want to seal at the bottom, and then rotate the tire around where your hands are. This will slosh the sealant up into the side wall. Rotate, wait a sec for the sealant to get down to the bottom and repeat. It might take a few days to find all the little leaks, but once found the tire should hold air for quite some time.
Rub down the rim braking surface with alchohol to clean off the soap residue
How I use it:
I'm 135lbs and used to have to run 50psi to keep from pinch flatting. Now I run 35psi. Many run lower but I don't like that feeling of the tire rolling off the rim in the rear. Even though it isn't rolling off it feels like it to me.
The sealant lasts I don't know how long. I do know that it does start to harden and if you open it up after a couple of months you may find no sealant but these little latex balls also known as Stan's boogers. Also the sealant dries all over the rim strip and the tire bead. Making it harder to air up the next time. It takes lots of water and scrubbing to remove the old sealant. So you need to check up on it and put new sealant in before it is all dried up. Because it is the sealant that keeps your tires aired up when a thorn or puncture cuts the tire.
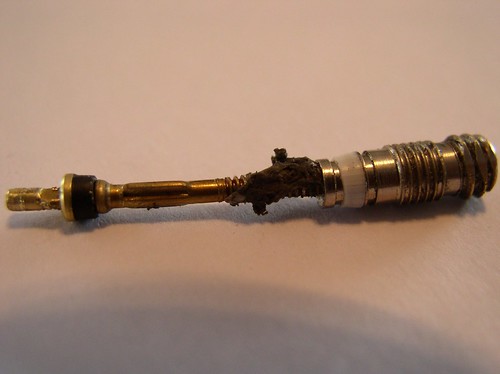
You will need check up on the valve and any dried latex that gets stuck in there. It pretty easy to remove it and take it apart. But in case you don't want to perform micro surgery on the valve on your kitchen island and risk using your wife's good dish towel (don't ask me how I know this) you can always by replacement valves for 2$ or so.
** Addendum.
I just watched the latest video at notubes.com on installation. He's got a much more indepth video. Additional tips
-remove the valve core during airing. lets more air in making air up easier
-smack the tire every 5 inches or so around the entire diameter to help give it some shape
-lay tire down flat (on top of a bucket) to help get sealant to go to bead area.
Conclusions:
I love it even though it is a pain to get set up and maintain. If you change tires often it can be a pain. But I think the advantages of weight, traction, and handling improvement outweight the negatives. Knock on wood, have not gotten a flat since using it, and my handling and climbing traction have improved noticeably.
posted by Ashwin Amanna @ 7:54 PM
4 comments
![]()


4 Comments:
Stan's will always be a pain in the rear to install, but one trick that has kept me from jumping off the roof when installing is to mount the tire in a stationary bicycle trainer when installing the system. It's super stable and you can rotate and slap/bang on the tire while using the air compressor to get it to inflate. And if you have to walk away for a minute to regain your composure, the tire doesn't fall over and spill out the sealant. Once you get it to hold air for a night, you pretty much have worry free tires for the next few months, they work great once installed. It's just very, very hard to keep that in mind while you're crying and swearing at a soapy bicycle tire in your garage.
I've really enjoyed having a look around your blog today, keep up the good work!
It's great when you are just surfing the web and find something wonderful like this!
I appreciate how detailed this guide is, especially regarding tire/rim compatibility.
Post a Comment
<< Home