Tuesday, April 25, 2006

Going Custom Part 6: Choosing a Color

This is part 6 of the Going Custom Series

Choosing a Color
opq

Ok, the design has been finalized. He's ready to build it. One of the great things about Jim is his super leadtime. 5-6 weeks. As compared to 10-12 or upwards of 4months to a year for some other builders.

The bad thing about Jim is his short lead time. It gives me less time to choose a color.

It is funny how many arguements I've gotten into with my wife over color choices for bicycles over the years. If you haven't figured it out yet, I'm a little out of the norm on some things. I'd suggest a color to her she typically wouldn't like it.

Oftentimes you go to the person you are closest to in the world, and suggest something looking for their validation. And when you don't get it you get mad. I haven't asked her yet about color for this frame. Maybe she'll post her comments here with her choice?

Paint and color in some ways make the frame. While the fundamental design and construction define the bicycle's riding characteristics, it is the color/paint that are the face of the bike. Obviously, the most important thing is the feel, ride, handling, fit of the bike. But I'm not fool enough to say that color doesn't matter.

A high end paint job from Bayliss or Joe Bell and even Spectrum
adds on significantly to the price of a frame. Hell, even painting a fork adds on. Some bikes such a lugged roadies really do need a top end paint job. The quality of construction is magnified under a good paint job especially one with masked lugs.

Jim is known primarily as a Ti builder. Most Ti bikes are unpainted and the welds are in full view for scrutinty. It's a parlor game on the forums to show off your Ti welds from Moots, Dean, etc. Jim's welds are as good as anyones consider that he taught a lot of the Moost welders. I jokingly said "I think choosing a color is harder than choosing a builder." He replied back :"Since I'm building the bike, I'll just take that as a compliment. Otherwise, I'd have to question your priorities..."

You would be surprised how many people are more concerned with matching the color of their bartape more than proper fit, geometry and design. Sometimes I have to wonder if I am not one of those people.

This bike's character is more of a work horse mountain biker's road bike. It doesn't need a super high end paint job, HOWEVER, it does need to look good.

If you can't be good, you should at least strive to look good. Decals have to go with the color. Bar tape...stem /seatpost...etc..

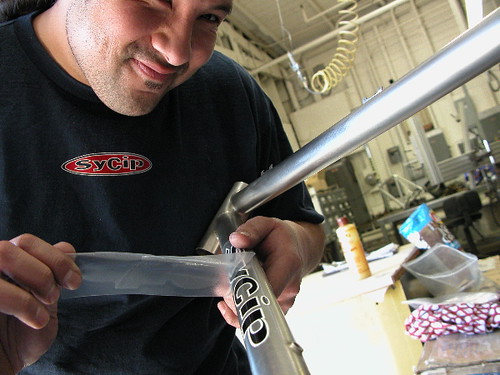
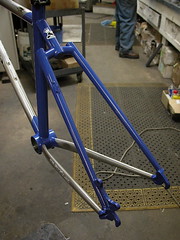
Jim gets his frames powder coated at Sycip. For more elaborate paint jobs he'll send it to Spectrum with an upcharge. I need to verify what if any options such as sparkle undercoat, etc are options.

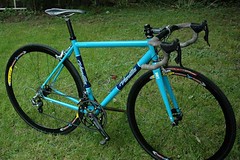
I'd like to get panels
vanilla_2231

But that adds on a fair amount so am not going to pursue that. Painting the fork adds on some so going with a color that will go with a carbon fork will save that cost.

I like to be different. Stand out amongst the crowd. But I don't want to be laughed-at/heckeld at sort of stand out.


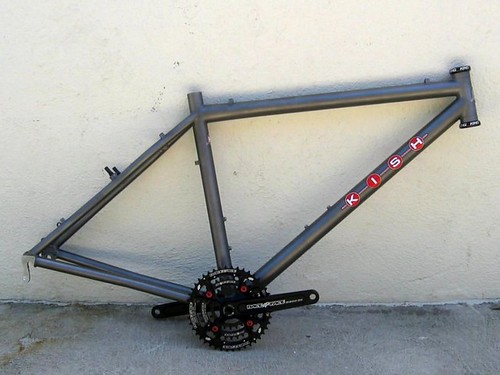
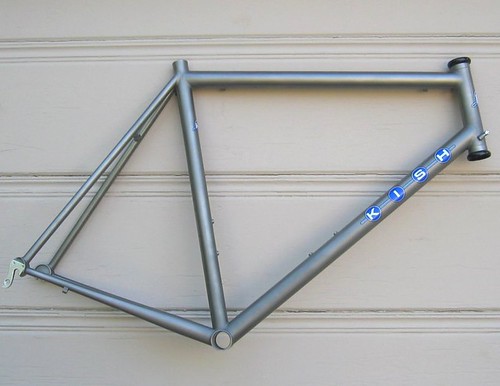
Jim's Decal Options are:
White letters, Red circles

01_Kish_mtb_frame
White letters, Blue circles
kish_ti_frame
White letters, Gold circles
kish
White letters, Clear circles
kish_black_ti_03
Black letters, Clear circles

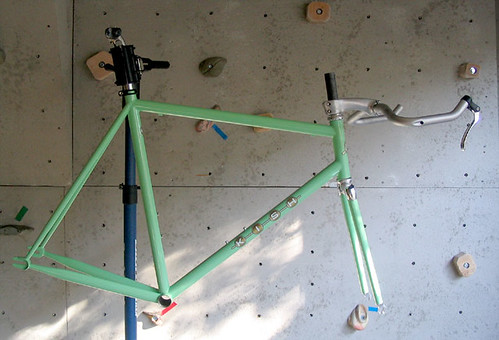
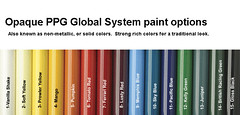
Here's some of the colors I'm thinking of:
I'd need to go powdercoat, some examples below are probably wet paint. They're just ideas.

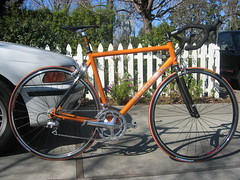
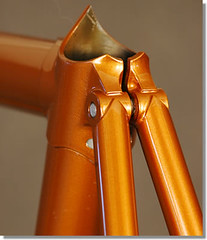
Orange
-I always love orange.
Vickery_400 MVC-461X
ds1
IMG_2212

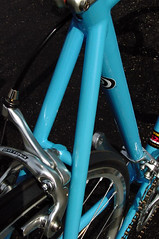
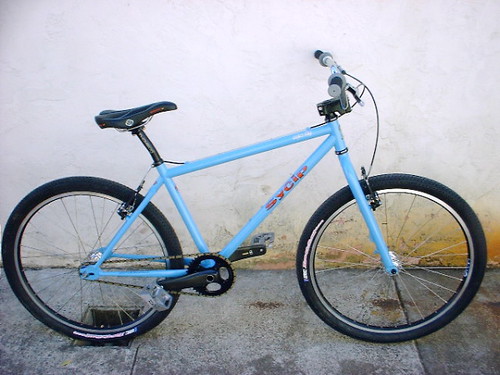
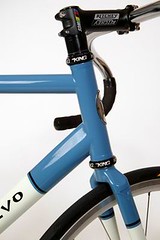
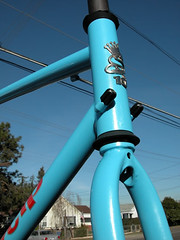
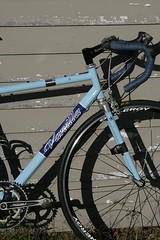
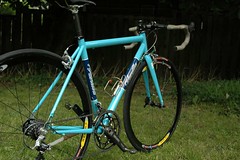
Sky Blue
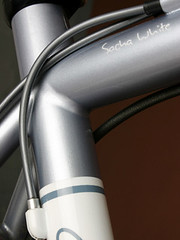
I've noticed several custom builders with Sky blue bikes. It's a color that you don't see much on production bikes. So it fits that stand out in the crowd motif. There are several variations on the theme below. Red decals look nice as does white.
Vanilla_02 SR525br3
l7

steel_track_5_lg Blue10thRoadFrame sacha5

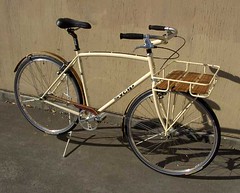
Creme
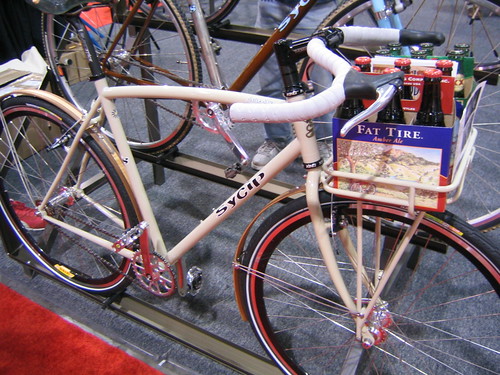
This one sort of caught my eye.
java_creme
IMG_0537

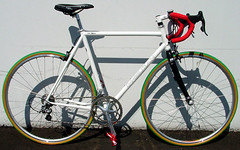
Simple White
I had a white mountain bike. It worked ok, but white on a road bike works better
SRWAa ericsterner_bike2_IMG_1302
l9
David-Seattle-145 bike_matty_IMG_0805 cc014-3IMG_0788

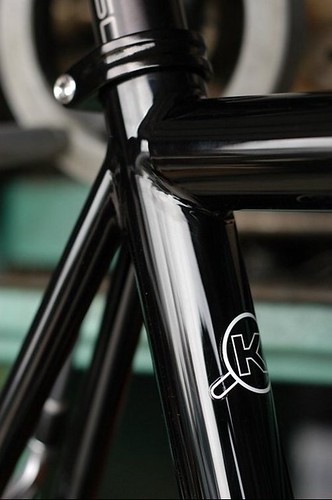
Black
Black works with any outfit
kish_black_ti_03
kish_black_ti_02 kish_black_ti_04
Charcoal Black
111-1185_IMG

Silver
l9
5

There are other colors
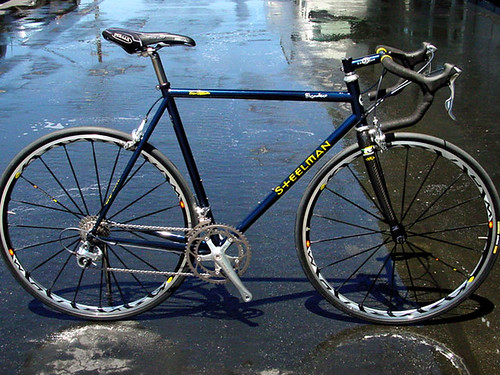
Like a deep midnight blue (metallic),
SigFa

Basic Dark Blue
l12

Right now I'm kinda leaning towards the Black. Maybe the white with red decals.

It's one of those things where you want to get what you want, but at the same time you want someone else to tell you what looks good. See what I said about me being one of those people that prioritize how it looks over everything else!

*EDIT
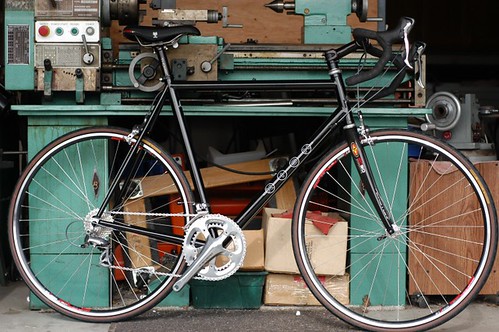
Color Chosen
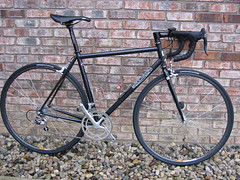
Gloss Black
Decal: White outline/black letters
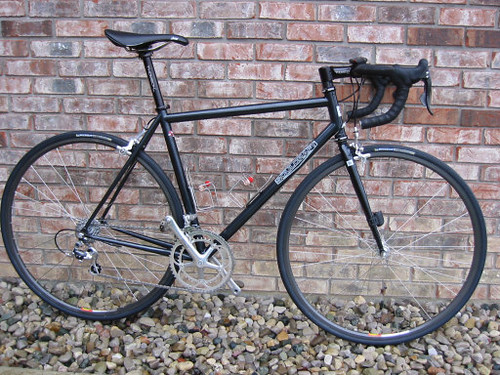
Similar to this
New Image

Sunday, April 23, 2006

Cleaning Old Farm

Old Farm, aka the Gateway trail in Blacksburg is a fixture on Brush Mountain. It was one of the first trails I ever rode up when I moved here. From that first day it has been my nemesis, reducing me to a pulp both climbing and descending.

In the 12 or 13 years I've lived here I've cleaned it w/o dabbing less than 10 times. Yesterday John and I rode up it. I got to check out his new Trance2. Very nice.

It was wet. Running water down the trail sort of wet. Rocks were wet, roots were wet, piles of leaves were wet. I dropped a little tire pressure out of the Stan's. I also dropped a little air pressure out of the fork. That dropped the front end a tad making it easier to keep it down and also made it easier to loft when needed. Via pedal stroke or pulling up. That makes technical climbing much much better.

There are two ways to approach Old Farm. Going for the clean, or going for time. The two are mutually exclusive. There are like 7 or 8 technical sections. The only way I can clean them is when I approached them with some reserves. When going for time, I'm already into the red when the tech sections are reached, and there is no way for me to go any harder.

When going for the clean, I ride very conservatively, almost easy until prior to the tech sections. Then I'll gear up and increase cadence. After the section recover. Till the next. It is always a mental game. Every time one section gets completed I find myself thinking of the glory of summiting fully clean. And typically I screw up the next tech section or more often than not make some dumb mistake on a small rock or root.

Yesterday I couldn't believe how well the HP was hooking up on the roots/rocks. Sometimes when your balance points are on and the stars align you can ride anything. Typically, I'd spin the tire out trying to pedal on any wet root. But I was able to unweight and shift the C/G over forward just enough that the tire wouldn't slip.

It probably helped that earlier in the morning I'd done some Leadout intervals on the trainer. Leadouts are done in the saddle with a hard starting gear. Ramp up till 140rpm or so and hold. Total on 20seconds. 20 off repeatx8 rest. 4 sets of those. They hurt. I hate them. But I am realizing that these are probably one of the MOST important workouts for mountain biking. There are so so many situations where the ability to ramp up cadence in a good gear is required. So many grunt climbs and technical sections use this type of technique to get over and through them with momentum.

The key is to be able to recover afterwards and keep going at a steady pace.

There is a big difference between PR time and clean time for me. Yesterday was about 4-5minutes off pr pace.

But it is nice to not have to push, even if it is slower.

Friday, April 21, 2006

This guy's living my dream

Blog on Doug Fattic's framebuilding class

Thursday, April 20, 2006

Going Custom Part 5: Final Design

After some more email and phone discussion with Jim Kish we finalized the design:

ST length c-c 49cm
TT length (effective, c-c) 51.5cm
TT slope ~7.5 degrees
HT length 14cm
ST angle 73
HT angle 73
BB drop 7cm

Recommended stem length 11cm (anywhere from 0 degree to -10 degree, depending on desired bar position and spacers)

2 water bottles, ST bottle above front der clamp
TT brake routing, cable stops under TT
STI HT mounted shifter cable adjusters
Salsa dropouts
Alpha Q 44mm rake fork 1.125" steerer
27.2 seat post
68mm English BB shell
1.125" front derailleur clamp.

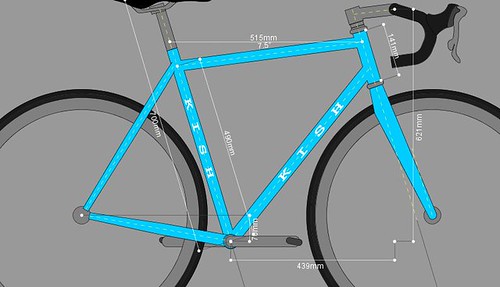
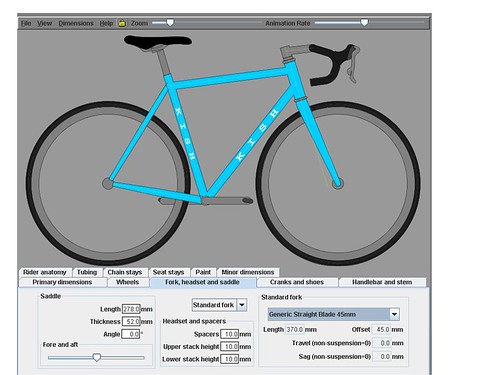
I plugged in exact HS stack heights, fork heights, and tube diameters into BikeCad
kish

Jim never once said the bar is going to be exactly here... I think he has built enough bikes to know that you just can't know for sure until you build the bike up, given small differences in tire diameters, HS stack heights, fork rakes, fork heights, etc.....

So with this CAD drawing even though it is showing mm dimensions it might not be reality. But it will be close which is what stem spacers and different stem rises are for. The bike will look good with a stem between -10 degrees or -5 or even 0. That is a lot of variation for changing bar position.

The above drawing shows a -10 degree stem with 10cm of spacers. The Free version of Bike CAD does not give you the dimiension from the saddle to the top of the bar. But you can extrapolate it. Because it does give the Handlebar height above the BB (621mm). Add 13mm to get from the center of the bar to the top of the bar=634mm

And I know my saddle will be at 700mm and the seat tube angle is 73 degrees. So I can calculate how high above the BB the saddle will be in the vertical plane (sin73*700=669.4). My desired drop from the top of the saddle to the top of the Handle Bar is 35mm which we found in the bike fit.

669-634=35mm

BAM!

What about reach?

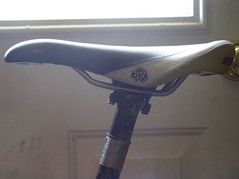
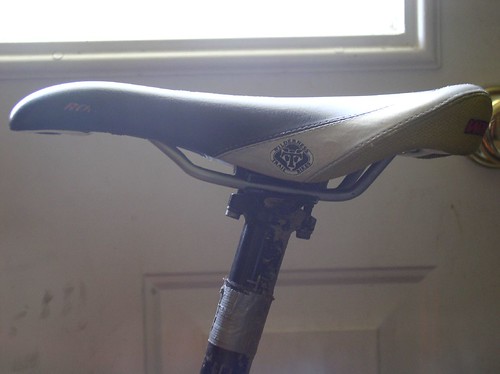
I am going to use a Rocket V saddle just like on my two mountain bikes
P1010061

the setback behind the BB is 50mm.

My road bike Serotta fit shows a reach from tip of saddle to center of bar of 470mm. This was measured with a Selle San Marco that had a set back of 28mm
So with the Rocket V it would be around 470+(50-28)=492.

The diagram shows BB to Bar of 439. Add the 50 for the saddle setback and you're at 489. Close enough for government work.

See what you can do with your time when you don't watch TV.

I am really really pleased with the final design. It has accomplished several of my original goals.
-The stem length is proportional to the top tube. Not too long or too short. 90-100 is too short, 120-130 is too long
-The bars are getting high enough w/o resorting to a)lots of spacers, b) a high rise stem
-The slope of the top tube is gradual and not super slopey like those Giant compact geometry
-It looks balanced, and also has a sleek-racer look with the negative rise on the stem.


So the design is finalized, and it is in his que. He needs to know color by 5/5/06. And if I want a fork painted he needs that too.

Oh man. Choosing a color!! Maybe it would have been better to go with a builder who's leadtime was 4 months as it probably takes that long to chose a color.

Stay tuned for choosing a color!!!

Tuesday, April 18, 2006

Going Custom: Part 4: Choosing a fork

Going Custom Part 4: Fork Selection

This is part 4 of the Going Custom series

Choosing a fork.

I am a little surprised how much of a big deal choosing a fork has become. It’s been an up/down back/forth adventure between many issues. Including: aesthetics, cost, weight, performance, etc.

There are many opinions on forks. Many steel purists scoff at carbon forks on a steel bike, especially a custom steel bike. Lots of people on the forums talk about the feel of a custom steel fork compared to carbon. A lot of pseudo science fueled with passion. Just like anything on the forums, most of it is crap. Though I am very impressionable to what I read.

I asked the builder about fork selection. Who better than the person who is building the bike to decide what goes on the front end? Of any component, the fork probably has to have the most impact on the performance of the bike after the frame. In actuality I was a little disappointed that he didn’t come out and say, This fork, or that fork. Steel for sure, etc…

He’s definitely a modern builder in terms of his philosophies of forks. From a feel or performance perspective, he questions a lot of the “Princess and the Pea” phenomena that you read about on the forums. Sure there will be some difference but in the end not big enough for that to be the deciding factor. But he does need to know the exact fork in order to build the frame properly around the rake and the axle-to-crown height.

The biggest issues are weight and looks.

It used to be that a big carbon fork just didn’t look right, but now that they are in use so much he doesn’t give them a second look. Over the years he has started to build many more Ti frames than anything else. 99% of the time a carbon fork goes on a Ti bike. Aesthetically, a lugged steel bike needs a lugged steel fork. That is just that. There is also that hand-made just for my bike thingy about getting a fork made just for the custom bike. In this case a custom steel fork would be outsourced from Soulcraft. Which is the fork in this pic which is my favorite. They too are a small custom shop and were on my short list so that la-la support the small guy, handmade cool factor is still there.

But a TIG welded simple, clean road bike looks really close to a TIG welded simple Ti bike. So a carbon fork doesn’t look wrong. Though a thin bladed straight steel fork DOES look the best in my opinion.
111-1185_IMG


It is funny that the Woundup Fork is a Frankenstein of a lugged straight bladed look but with carbon legs. Yet a lot of people consider them ugly. Painted they look a heck of a lot like a steel fork.
kish
But they are expensive new and on the heavier side.

But weight is where the biggest issue is. In general a carbon fork will be between 350-450grams. With the really superlights being sub 300. A steel fork is in the range of 750-800grams. 2/3 to 1lb. A lot? Or a little? Depends on your point of view.

It just seems silly to be obsessed with weight enough to go for a lighter steel tubeset such as Columbus Life, and then blow it all into a steel fork. If, say it is true, that performance and function are close enough to be discounted, weight is the biggest factor. Especially when my emphasis is on climbing. Yes I know that weight isn’t truly a big deal, I’ve seen the numbers at analytic cycling. But I just can’t help it. Sorry.

There is also a cost factor. A custom steel fork goes for $300 including matching paint. Carbon forks have such a huge range. There are so many made especially by no-name Taiwan and many are available used or closeout that you can get them from under $100-$300. But there is an upcharge on paint because they have to be wet painted separately from the powdercoated frame. And the carbon fork really needs to be painted with the frame IMHO.

I am pretty sure I’m going with a carbon fork. I’m enough of a weight weenie that I’d be thinking about it too much if I went steel. Especially hearing from a builder who has built hundreds and hundreds of frames say that performance between the two is mute.

But now the issue is which fork?

The design has been optimized around a 45mm rake fork. But can easily be tweaked to work with 44mm or even 43 if necessary. I’m also using a traditional headset so have to make sure to get one that isn’t too bulbous and specifically for integrated headsets. But most of them don’t look bad on a traditional headset. 45mm OD still works fine on a traditional headset.

Cost? I’m not going to get a top model 2006 brand name fork. Maybe closeout or mid level model. How are the Taiwanese no name forks? Considering that many big names buy frames and forks from Taiwan manufacturers and rebrand them. I am guessing that they are just fine. The Taiwanese carbon merchants are probably some of the most sophisticated fabricators in the world. But there might always be a question of how the compare to more name brands.

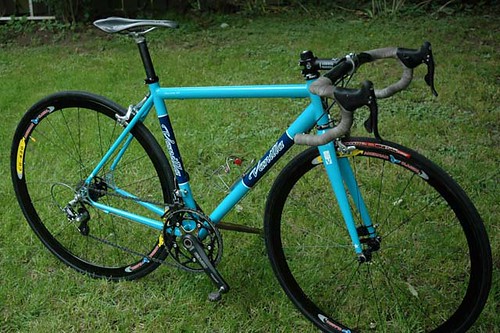
There are straight bladed carbon forks that give a look I like. Wound up of course. Alpha Q’s being the most popular.
vanilla_2231
They utilize an aluminum sleeve that is glued into the steerer tube and a traditional aheadset star nut. I really like this design as I am always spooked about the carbon steerers when on a descent, and a starnut is SO much easier to work with than the expander wedges. Yet there are thousands of carbon steerer forks with expander wedges in use everyday. But it is really hard to get these used because the steerer length has already been defined and I won’t know till later what my final length will be. The aluminum sleeve also blows the advertised weights out of the water. And the light ones cost too much

Other ones considered are the Ouzo pro, long considered a standard. Though it is really hard to find in 45mm used. And I don’t like the look as much.

Look HSC 3. 360 grams but available at good prices. It is part str8 leg part curved. An ugly one actually came on the Ti bike when I first got it. I like the look.

There is this Trigon Taiwanese straight blade. Light at 380g uncut. Looks really close to the Alpha Q.

Real Designs HP 380g available cheap. But a funky look that might not go with the frame.

I just go back and forth between cost, looks, no-name vs top brand, etc. I’m so cheap and all about getting the best deal/value it is tough.


EDIT: I am going with a 2004 model Alpha Q. Not sure which model yet but 44 rake. I like the glue in insert and they have a good reputation. It is funny. What really made me get off the fence about steel vs carbon was reading a post from the guy that owns the Soulcraft pictured above. He switched from that fork to a Carbon Ouzo pro and liked it better. Totally lame on my part to be swayed by one persons post on a forum, isn't it.

Riding a wave

A few days after a rest week, is the best time to ride. My legs feel pretty good and are finally coming back after the staleness of the MSP. The next weeks are final transition into the in season type of stuff.

This training is hard mentally because so much of it is performed in a fatigued state. Not so much that you get injured or over trained, but enough to mess with your head. The basis for all rides becomes those one or two stellar rides that you have when you are fresh. So you think you suck during the rest of the time even though your are working towards the dream. It's hard but it is efficient training, and works.

Today was a good day, as was this weekend. Long rides at Douthat state park. Man there is some steep climbing there. I am going to do simulations on a trail here called Dodger. Everyone considers it a downhill only trail. Climbing it is an excercise in futility. Which makes it good training.

Pretty soon I'll be gearing up for race simulations. Given family time, it is really hard to get out for lots of races. It just takes too much prep and travel time, and shoots an entire weekend. So I only do it a few times a year. But it is so hard to push yourself as hard in training.

My goal is to sort of switch around how I've mentally approached training and racing. Training races have been performed at a good solid output of effort. Hard but not cramp out eyes bugging out sort of thing. I've been so jacked up at races that I ride into the ground and cramp out. I am hoping to try and do my race sims with the same lack of restraint as I used to race, and hope to race with a more conservative pacing that gets me to the finish faster.

We'll see. This is what sets good riders apart. They can put themselves into the hurt locker at will.

Tuesday, April 11, 2006

Going Custom: Part 3: Design

This is part 3 of the Going Custom series on the adventure of getting a custom road bike.

I have been emailing back and forth with Jim Kish, the builder about some design issues and we spoke today to clarify some things.

Based on my Serotta fits, the detailed dimensions of my last two road bikes, and all my ramblings on the kind of bike I'm looking for, Jim came up with a very initial design.

ST length c-c 49cm
TT length (effective, c-c) 51.5cm
HT length 14cm
ST angle 73
HT angle 73
BB drop 7cm

Stem length 11cm (80 degree)
Fork rake 4.5cm

He said that this design should do a few things for me.

1. Standover should be fine, slightly less than Primus Mootry, a bit more than the Moon.
2. Longer head tube length should allow you some freedom with spacers/stems, it should require (approx, depending on stem profile) 1 cm worth of spacers to put you at your previous position of the PM bike.
3. ST length coupled with HT length puts the TT slope at 7.5 degrees, which should follow the angle of your stem very closely (A Thomson stem, for example, in the 80- degree position leaves you with a 7 degree slope). I am hesitant to use less slope only because it will come at the expense of standover, and as it is standover sits at 77.5cm.
4. TT and stem length now work a little better together, you don't have either scenario of you last bikes that would throw off weight distribution or aesthetic.

Jim also asked a few more questions...

How many water bottles do you need to carry?
Do you need rack mounts?
What dropout do you prefer? I use either Breeze-in hooded drops or Salsa

The Breeze in dropouts are the hooded ones like are on the Ti Bike:
P1010008

The Salsa ones look a little awkward by themselves:


But one a bicycle they look nice:


The hooded Breeze in ones are nice but they give a heavy sort of look, where the Salsa ones look light and cleaner. So I am going with the Salsa. Also setting a QR on the hooded ones takes some getting used to as the QR goes down and forward, but that isn't a big deal. But I think the character I'm trying to get with this light, thin tubed steel frame would go better with the Salsa drops.

I am going with NO rack mounts.

2 water bottles but we are going to put the cage on the seat tube up higher above the front. der. clamp. The bottle location on the Ti bike
P1010003
is so low that I couldn't even get a small bottle out and had to use a big bottle.
That really bugged me.

I took the above dimensions and entered them into BikeCAD which is a free bicycle designer. The pay version gives you a lot more functionality, but this one is fun to play around with.

The design comes out really cool.
kish -10deg stem

What is really interesting is that the design calls for a -10degree stem.(*NOTE that a lot depends on how stem manufacturers describe their stems. Typically a -17 degree rise stem is horizantal when you put it on a 73 degree head tube) At first when I was entering in the dimensions it NEVER occured to me to put a negative degree. Given my issues of having to get the bar high enough always made me think of a stem with a fair amount of rise on it. The stem on the Moon was +5 as was the stem on the Ti bike. A +5 degree stem when you put it on a 73 degree head tube goes up at a fairly dramatic angle.
P1010021 P1010003

With the -10 degree stem the actual slope of the stem is almost identical to the slope of the top tube (*Maybe off by 1/2 a degree) But when you look at the bike the stem actually looks flatter. Some sort of optical illusion. The flatter look is more racier. And if you can't be fast you might as well look fast.

The biggest issue, of course is fit, and the ability to get the bars high enough. What Jim has done is increase the head tube length, increased the slope of the top tube, and also lowered the BB. All of which are serving to get the bars higher from the get go. I've got some leeway in terms of positioning the bars w/o resorting to funky stuff like lots of spacers or highly angled stems.

Right now he's calling for 1cm of spacers. I can go to 2 cm w/o it looking to weird. I can also go to a 0 degree stem which actually 'looks' more like it matches the slope of the top tube even though it is actually angled more.

We also talked about he Seat tube angle. I'm going to be using a WTB Rocket V saddle. My wife got me one a few years ago and I love it so much I got one for the hardtail, the FS and now I am going to get one for the road bike. Here is a picture of it on my hardtail which also has a 73 degree seat tube
P1010061

It is slightly pushed forward on the rails in order to get it at the right setback that places my knees in the right position relative to the pedal spindle. I was wondering about steepening the seat tube angle to center the saddle in the rails more. Also note this is used on a Thomson seatpost with small setback. Jim said that a rule of thumb is that for each degree things move about 20mm. And at this size of bike he felt that it wasn't a good idea to go to 74 STA. 73.5 maybe. The saddle placement isn't bad in terms of where it is on the rails, so I decided to keep it as is.

We talked a lot about the handling characteristics. I'm looking for a neutral bike but one that still has some get up and go. Jim is shooting for a 58-60 trail to give that kind of ride. It's a lot more complicated than that of course. There are so many factors that go into the design. Head tube angle, fork rake, stem length. And things change when designing a smaller frame as well.

With regards to fork, I wanted to hear it from the builder whether a steel fork or carbon fork was better in terms of the ride quality and handling. You hear so much from purists on the forums about a good steel frame needing a steel fork, etc. He said that it doesn't matter. As long as the rake and Axle-crown match the frame design the ride and handling will be pretty close. The steel fork will damp road shock a little more but the carbon will feel stiffer/snappier. The biggest thing really is cost, weight, and aesthetics.

Weight is the biggest one. Probably a 300-400gram difference. 2/3+ pounds.
Aesthetics is also the biggest. I've really liked the straight blade forks on bikes like this:
111-1185_IMG

Something about the straight blade and the small tubes on the fork going with the frame. And a painted to match fork also just goes right. It costs more to paint a carbon fork because it has to be wet painted and can't be powdered with the frame.

Here is the bike CAD with a straight blade fork:
Slide1

Aesthetic wise a thin tube straight guage fork looks the best. But is it worth a pound and possibly higher cost.

Regardless I need to decide because the actual fork has to be known to build the frame properly due to the axle-crown height.

The design currently is drawn around a 45mm rake, but it can be tweaked to work with 44 or even 43. But I guess with a frame this size a higher rake is desireable to achieve the right trail and handling characteristics. The whole are of bike design is something that fascinates me, and I hope to be able to gain a better handle on it in time and if I ever pursue my dream of framebuilding.

Alpha Q carbon forks are straight blade. But they come in a 44rake. Woundups are an option but they are in a class bythemselves. I like the look of the Eastons.

Comments on fork selection?

Monday, April 10, 2006

The world needs a carbon DW XC bike

Giant showed off a carbon Anthem at Sea Otter. I can't imagine what that weighs.

Ibis has got a carbon 5.5" DW link bike that is already sold out through November.


Where is the carbon 3.5-3.75" or 4" DW link XC bike? Well there is the IF Tungsten Electrode but that is just too too boutique to be consdered.

I don't know why I'm on this soap box. Maybe it's just that what I consider the perfect (aggressive) XC Race machine isn't out there yet.

-Relatively affordable
-DW link
-3.75-4" rear travel
-Lightweight-meaning competetive in weights to the Anthem, Racer X, Flux, Blur XC...

It's not like the technology isn't there. The Azure is the closest thing IH has got, but how can you place it in the same league as a Carbon Anthem or a Carbon Trance which is rumored for next year?

For now I'm going to ride the Hollowpoint and weight weenie parts to create a good buildkit until the right bike comes along, or there is a good deal on an Azure! One thing about the HP is that it pedals and climbs so good, that any shortcomings in weight can be forgiven for the time being.